If you are following me on Twitter, you know that I've been doing some Dojo development lately. While there's definitely a learning curve for Dojo (like with anything else) I'm now starting to appreciate its simplicity and power. This Dojo development is part of an internal BizTech project, for which i can't share too many details now.
When I first started designing the UI, my plan was to use iWidgets. iWidgets are pretty cool and they can pretty much run anywhere. The trick is to add the Lotus Mashup framework to your page (via 1-2 lines of JavaScript) and then you can run iWidgets on your homepage. This process is documented in the Lotus Mashup Wiki, and it looks like it's even easier in v1.1. Since I only have v1.0 available to me, I researched in a lot of place but still couldn't find how to add iWidgets to my page. Therefore, I discarded that approach and I'm going with pure Dojo widgets.
The idea of the Dojo widget is to give it a URL to a JSON output and have the widget render is data. I'm documenting the process here, at a high level, so I can reference it as I go forward with this project. I also hope it serves as a reference for other Dojo newbies (the Dojo documentation is not that great and I've been referring a lot to DojoCampus.org).
- Download and install the Dojo framework
- Create a blank HTML page and in the <HEAD> section
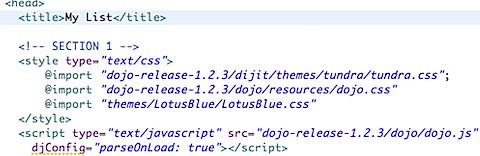
- After the above code, define which widgets and/or components you'll use

- After the code above, define the URL to the JSON output. Then tell Dojo to do the AJAX call for you. Dojo will ask you what function should be called after the asynchronous call to the JSON URL returns. Here's what I defined:
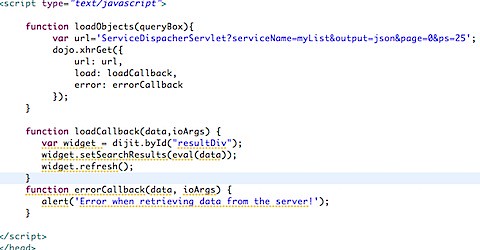
- In the code above, we tell Dojo to do a call to http://localhost/myapp/ServiceDispatcherServlet?... and tell it that once it receives the data to call loadCallback or if there was an error to call errorCallback. Finally, we close the HTML <HEAD> element. Still with me? Good! Now we define our main <BODY> code where the results will be shown:
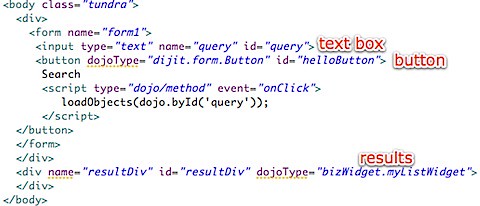
- That's all you have to do in the HTML. Now you have to create the widget file (in this case myListWidget.js under the folder bizWidget)
- Just like Java, in the widget file, you define the 'class name' and the dependencies:

- Now notice that in step 4 there were 2 methods called: refresh() and setSearchResults(). Here's how they look:
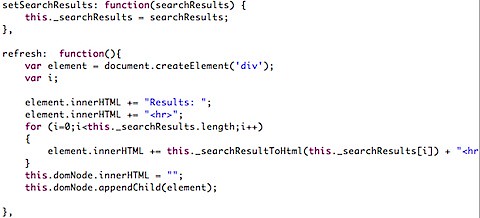
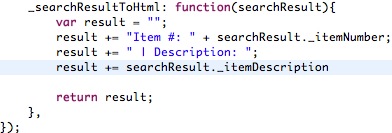
- And here's how the helper method _searchResultToHtml looks like:
- And there you have it! The very final step is to create a servlet that returns a list of items in JSON format. To do this, I basically created a java.util.List and the list elements were simple Java beans. I then used flexJSON to convert the Java List into a JSON formatted List and voilá
Enjoy!